5 Steps to iPhone Family Calendar Sharing
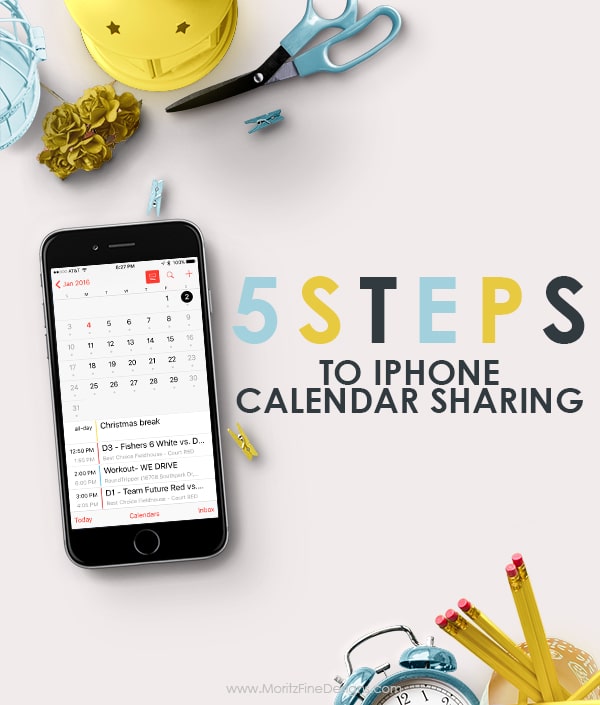
With 5 busy family members, I think I would ultimately go CRAZY if I didn’t have my iPhone to keep our family organized. Seriously, this is a game changer for me…for all of us, really.
Previous to this, I was using a paper calendar and what I hear multiple times a day is “what time is my…..” Our kids all have iPhones (because we have teens) and my youngest has an iPad for school. Since they are all connected to an apple device, it’s easy for them to check the calendar.
Want to get your family organized? Follow these 5 Steps to iPhone Family Calendar Sharing.
5 Steps to iPhone Family Calendar Sharing
STEP 1
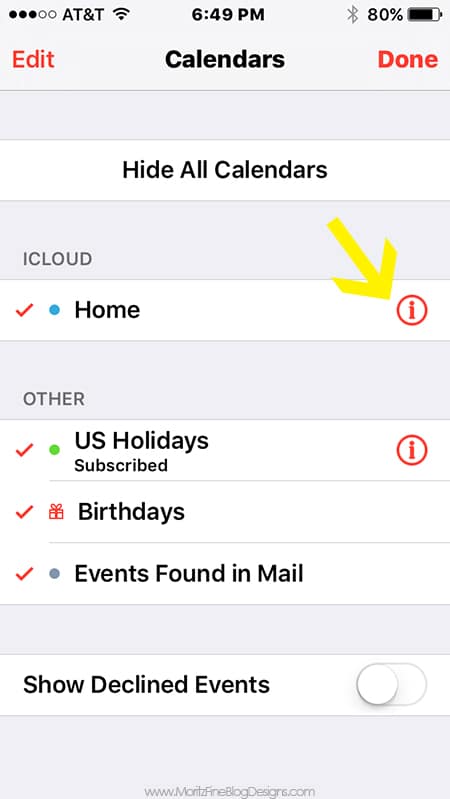
Open on the calendar app on your phone. Click on “calendars” at the bottom of the app.
STEP 2
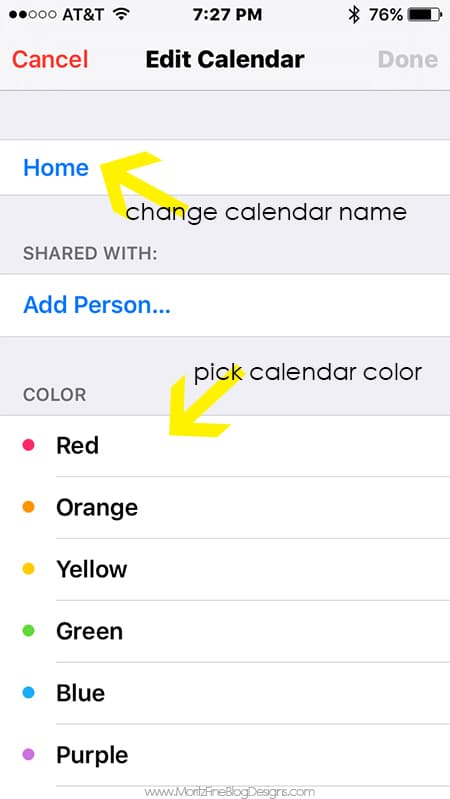
If you haven’t previously set up any calendars, the current default calendar is called “HOME”. You will want to pick a color for your calendar –> Click on the circled “i” next to “Home”. On this page you can change the title of the calendar, then pick the color you would like associated with this calendar. Then click “done”.
Next you will want to add other family members. There are 2 options to do this:
A. If your kids are older, they may want to set up a calendar on their own device and share it with you (if so have them jump to step #5 below and send you an invite)
OR
B. If you prefer to manage the calendar, you can set it up on your phone and share it with them. If you choose this method, you have the option to lock the events so they can’t change them (…ahem, or mess up the schedule!)
STEP 3
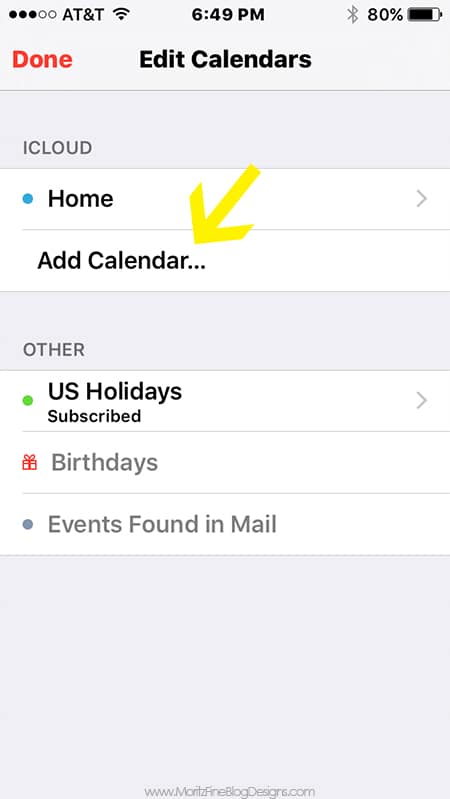
To add members through YOUR phone, click on “edit at the top of the Calendars page. Then click”add calendar”.
STEP 4
Enter the family member’s name, choose their color and click “done”. The new member is now added to your calendar member list.

STEP 5
To SHARE the calendar with others, click the new member’s name and click the “add person” option. Enter the email address of the person you want to share the calendar with. (For example, if I just added my son, i would enter his email address and he can accept the invite to see all of his events on his device. If you want to share the calendar with multiple people, simply add multiple email addresses.)
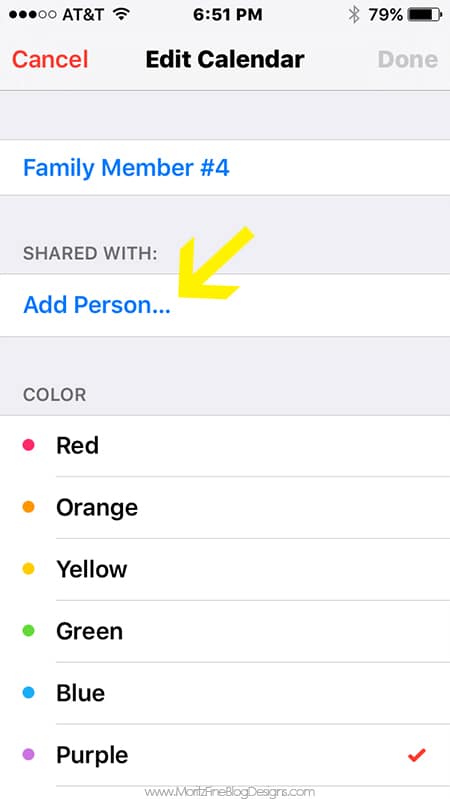
Have more family members to add? Repeat steps 4 and 5 until everyone is added.
One tip for you: When you share a calendar you have the option to let them view only or to view and edit. You choose!
It’s that easy! Now you can manage everyone’s calendar all from your phone! No more paper calendar and gone are the days of everyone asking you what time their events are! HOORAY! Life just got easier!
One tip for you: When you share a calendar you have the option to let them view only or to view and edit. You choose!
IT IS POSSIBLE TO
ENJOY STRESS FREE HOLIDAYS THIS YEAR!
The holiday season can be downright exhausting. We have too many things to do and not enough time to get them done. The 2024 HOLIDAY PLANNER will not only help you get organized, but will also help melt away that holiday stress so that you can actually enjoy the season!


